Hi everyone. I would like to introduce my cyber friend, Emily.
Emily makes Gorgeous, Wonderful, Classy Cake Truffles. I follow Emily on Facebook HERE. Check out all of her beautiful cake truffles and fun flavors, like Twinkie, Cola, and Margarita.
Once you graduate from my “elementary grade” Easy Cake Truffles, try your had at these “Graduate level” Classy Cake Truffles.
Classy Cake Truffles
Hey
everyone!
everyone!
I’m
Emily, of Emily.Kate.Design.
I’m so excited to be guest blogging for my dear friend Pint Sized
Baker! I’ve always loved everything
artsy since I can remember, and in the past few years, it’s expanded to the
world of confectionary art. The most
important thing I’ve learned? Practice,
practice, practice!
In
continuation of Karyn’s post Perfect Cake Truffles, I am going to
give you some tips and tricks that I have learned throughout my baking journey
on how to make “classy cake truffles.
continuation of Karyn’s post Perfect Cake Truffles, I am going to
give you some tips and tricks that I have learned throughout my baking journey
on how to make “classy cake truffles.
Step
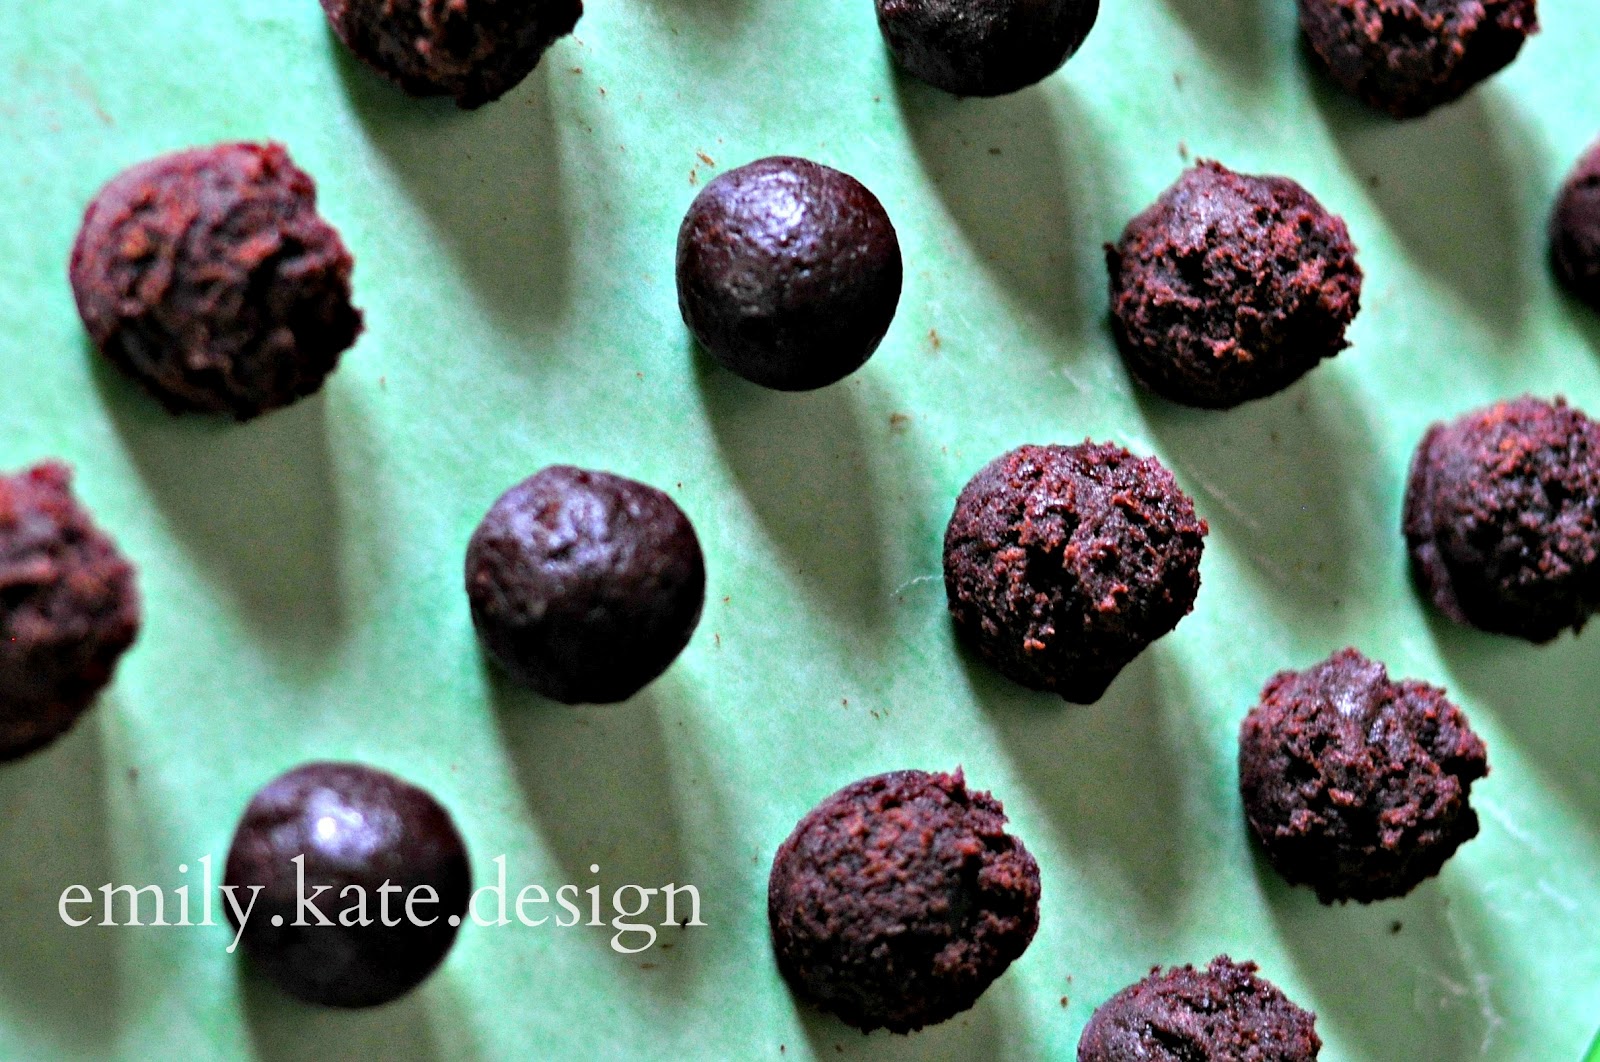
1. Roll your cake balls by hand. I’ve
used my Easy Roller a few times and found that at the end of the day, hand
rolling works the best, and your truffles have the individual attention and
love they deserve! To make the cake
balls consistent, I use a cookie scoop to size out the dough.
1. Roll your cake balls by hand. I’ve
used my Easy Roller a few times and found that at the end of the day, hand
rolling works the best, and your truffles have the individual attention and
love they deserve! To make the cake
balls consistent, I use a cookie scoop to size out the dough.
Step
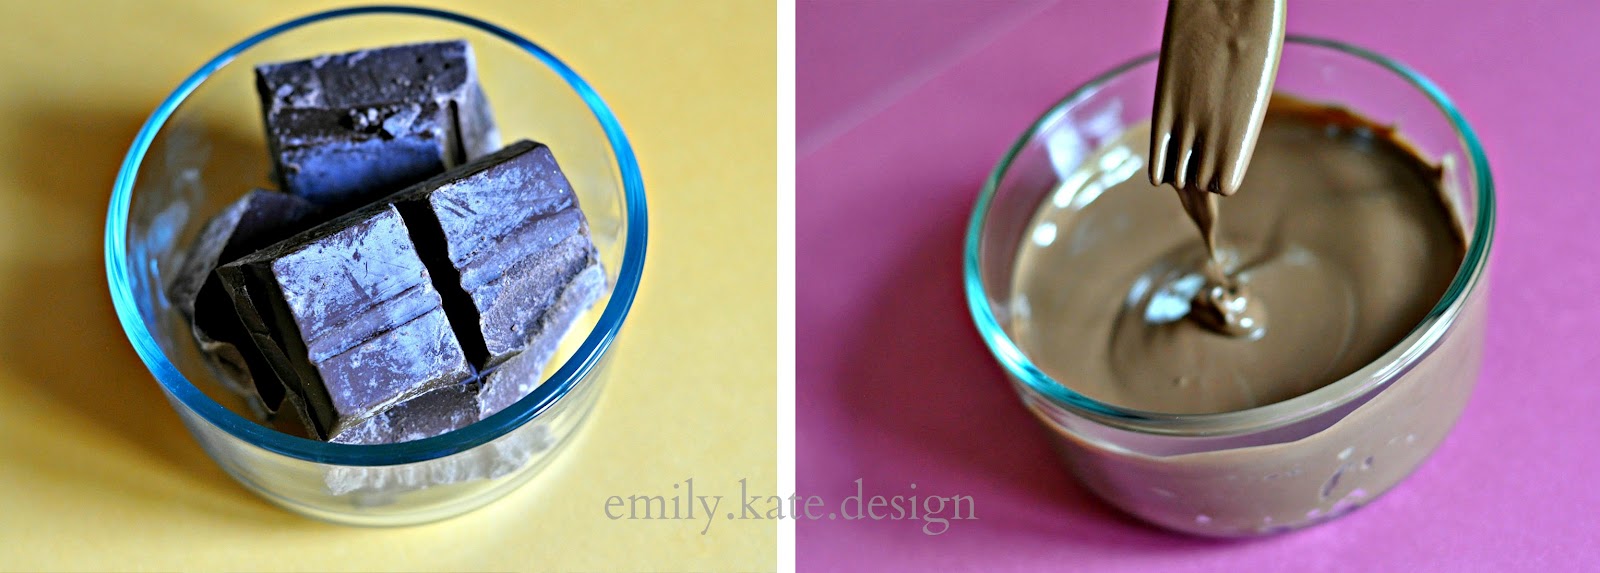
2. Melt your chocolate carefully! I’ve
realized that one of the most important steps to cake truffles is the chocolate
melting and dipping process. I always
melt my chocolate the same way regardless of the brand. The way I melt my chocolate is 2 minutes on
high, then stir. Place back in microwave
for another minute, stirring every 20 seconds.
Step
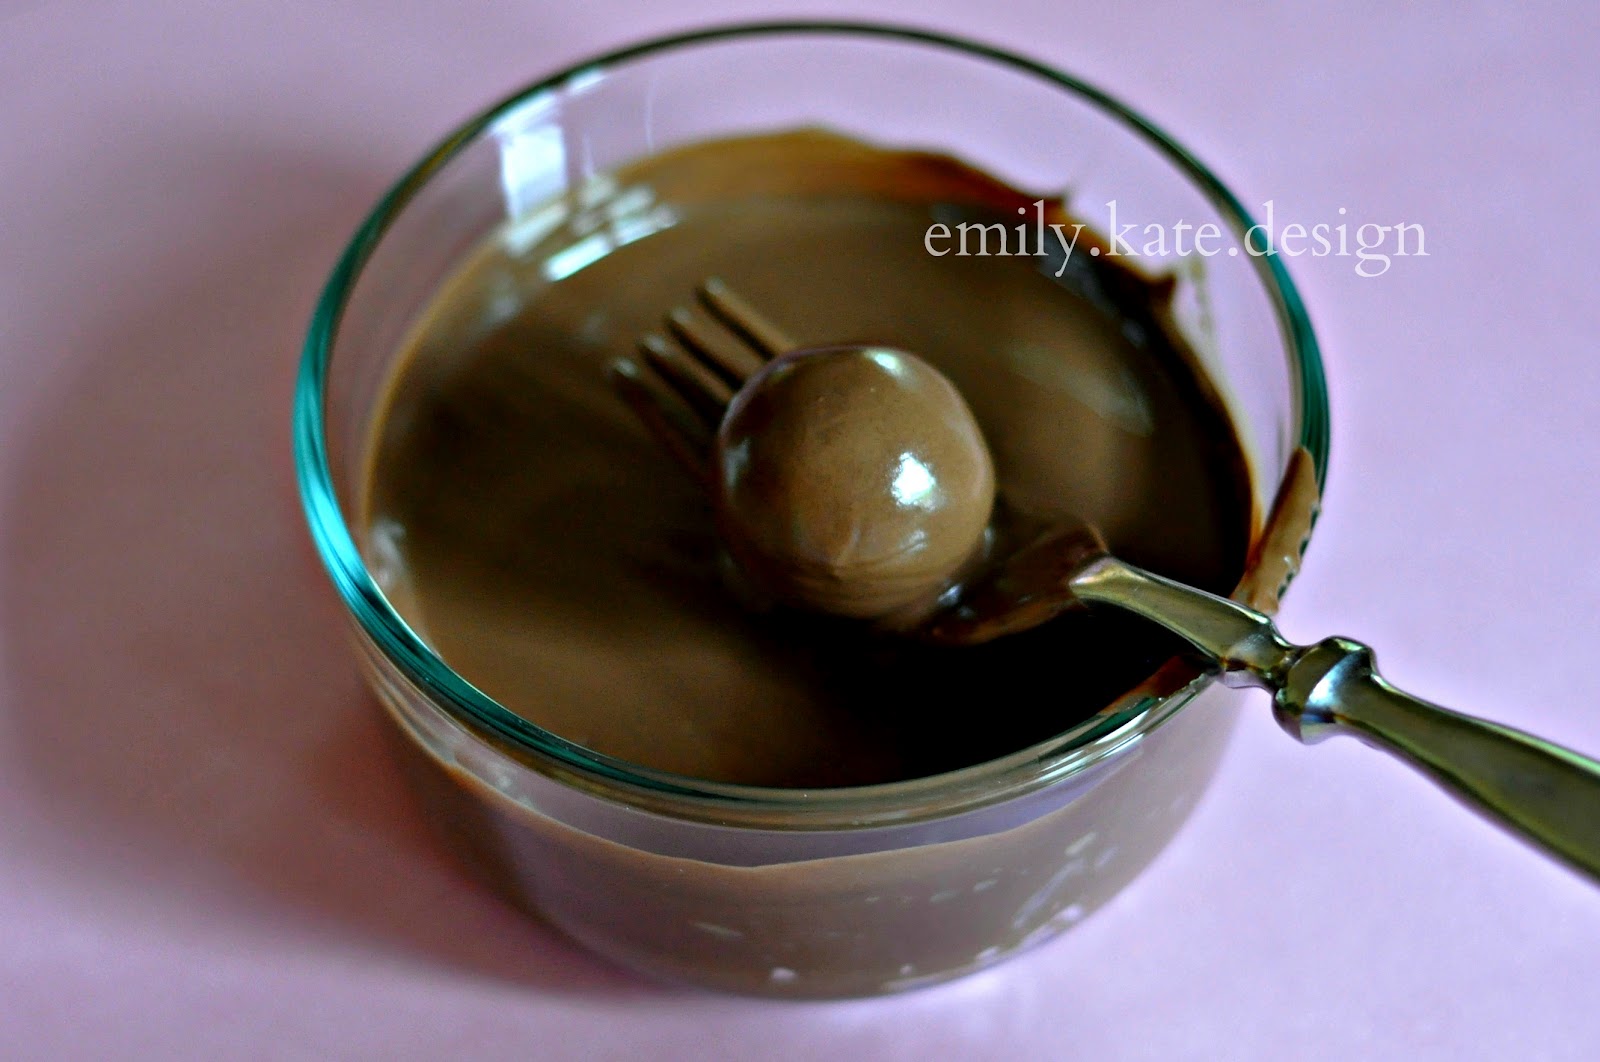
3. Dip! To make Perfect CakeTruffles, follow this post. Just
remember to tap the cake ball on the edge of your dish before placing – that
will help them have a perfectly smooth shape!
3. Dip! To make Perfect CakeTruffles, follow this post. Just
remember to tap the cake ball on the edge of your dish before placing – that
will help them have a perfectly smooth shape!
Step
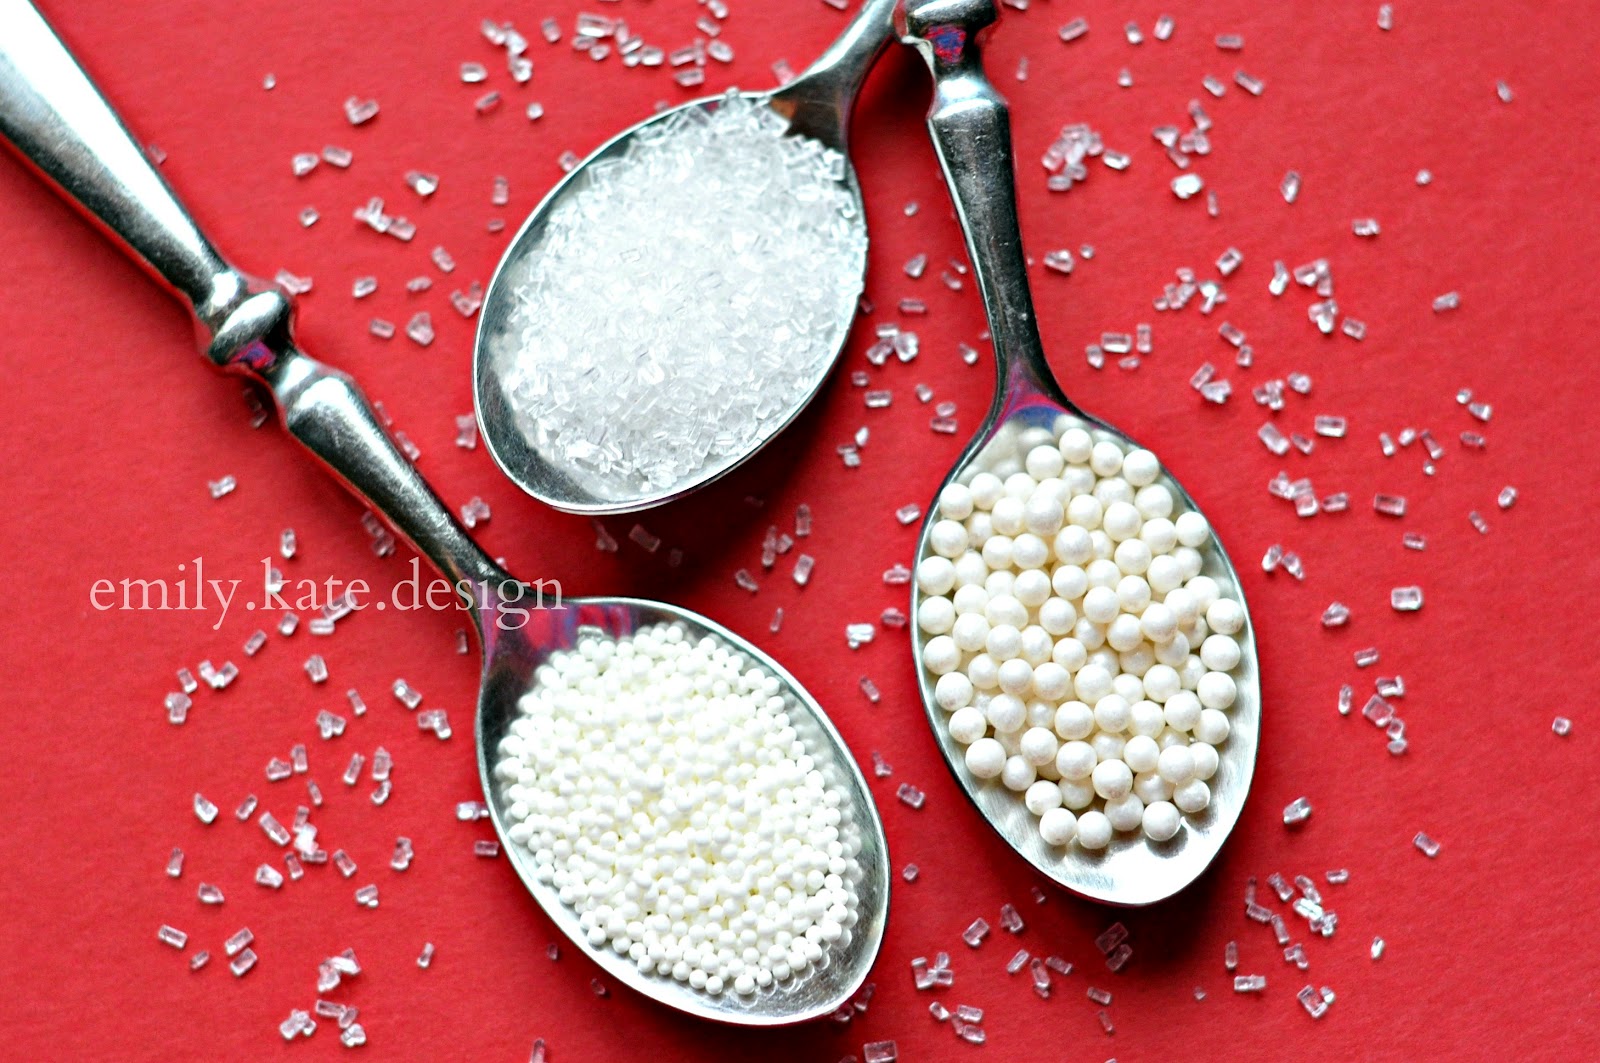
4. Prepare to decorate. I think there
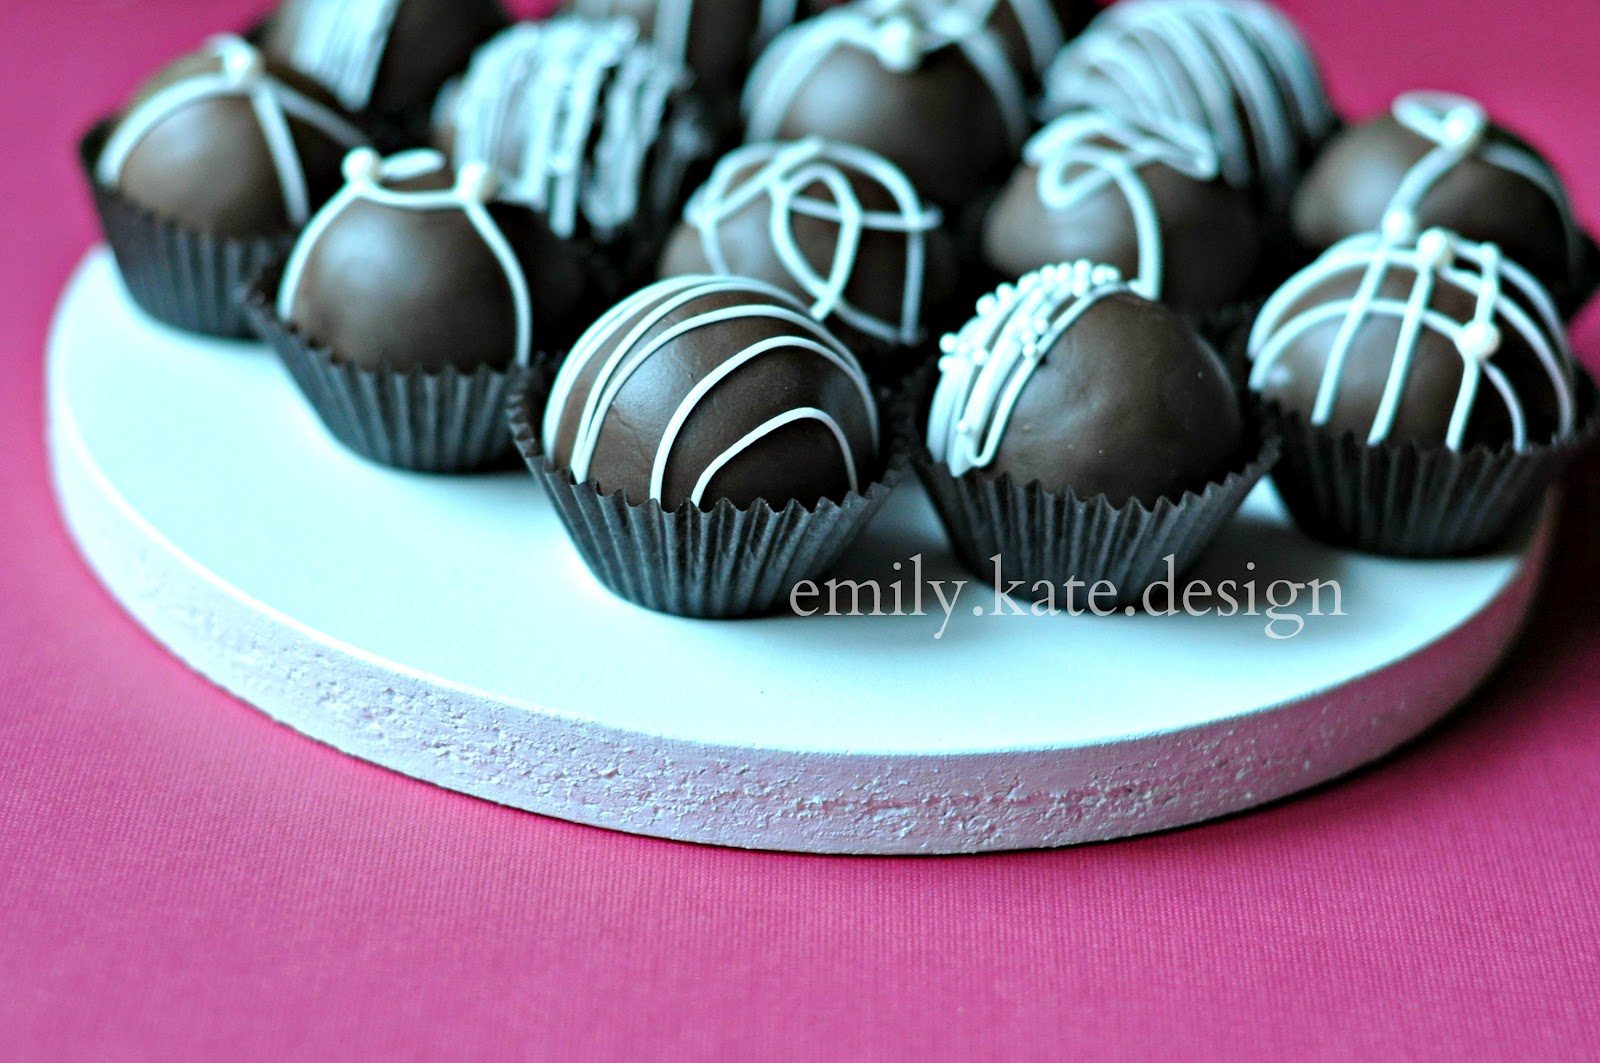
are three routes to choose: pipe, sprinkle, or both. I always make sure to plan out my theme
before I begin. I like to use simple
sprinkles that won’t take over the entire design of the cake truffle. Some of my favorites are pearls, non-perils,
and sugar crystals. I think they are all
very simple, elegant and classy. There
are endless color choices available, so you should be able to find something
that works for you!
4. Prepare to decorate. I think there
are three routes to choose: pipe, sprinkle, or both. I always make sure to plan out my theme
before I begin. I like to use simple
sprinkles that won’t take over the entire design of the cake truffle. Some of my favorites are pearls, non-perils,
and sugar crystals. I think they are all
very simple, elegant and classy. There
are endless color choices available, so you should be able to find something
that works for you!
Step
5. If you are going to pipe designs, you can use several different materials to
hold your chocolate. I tend to stick
with plastic baggies. I’ve also used
cake piping bags, parchment paper, and a piping pen. The fastest, most inexpensive route is
plastic baggies. Cut a small – SMALL
hole in the corner. You can always make
it bigger.

Step
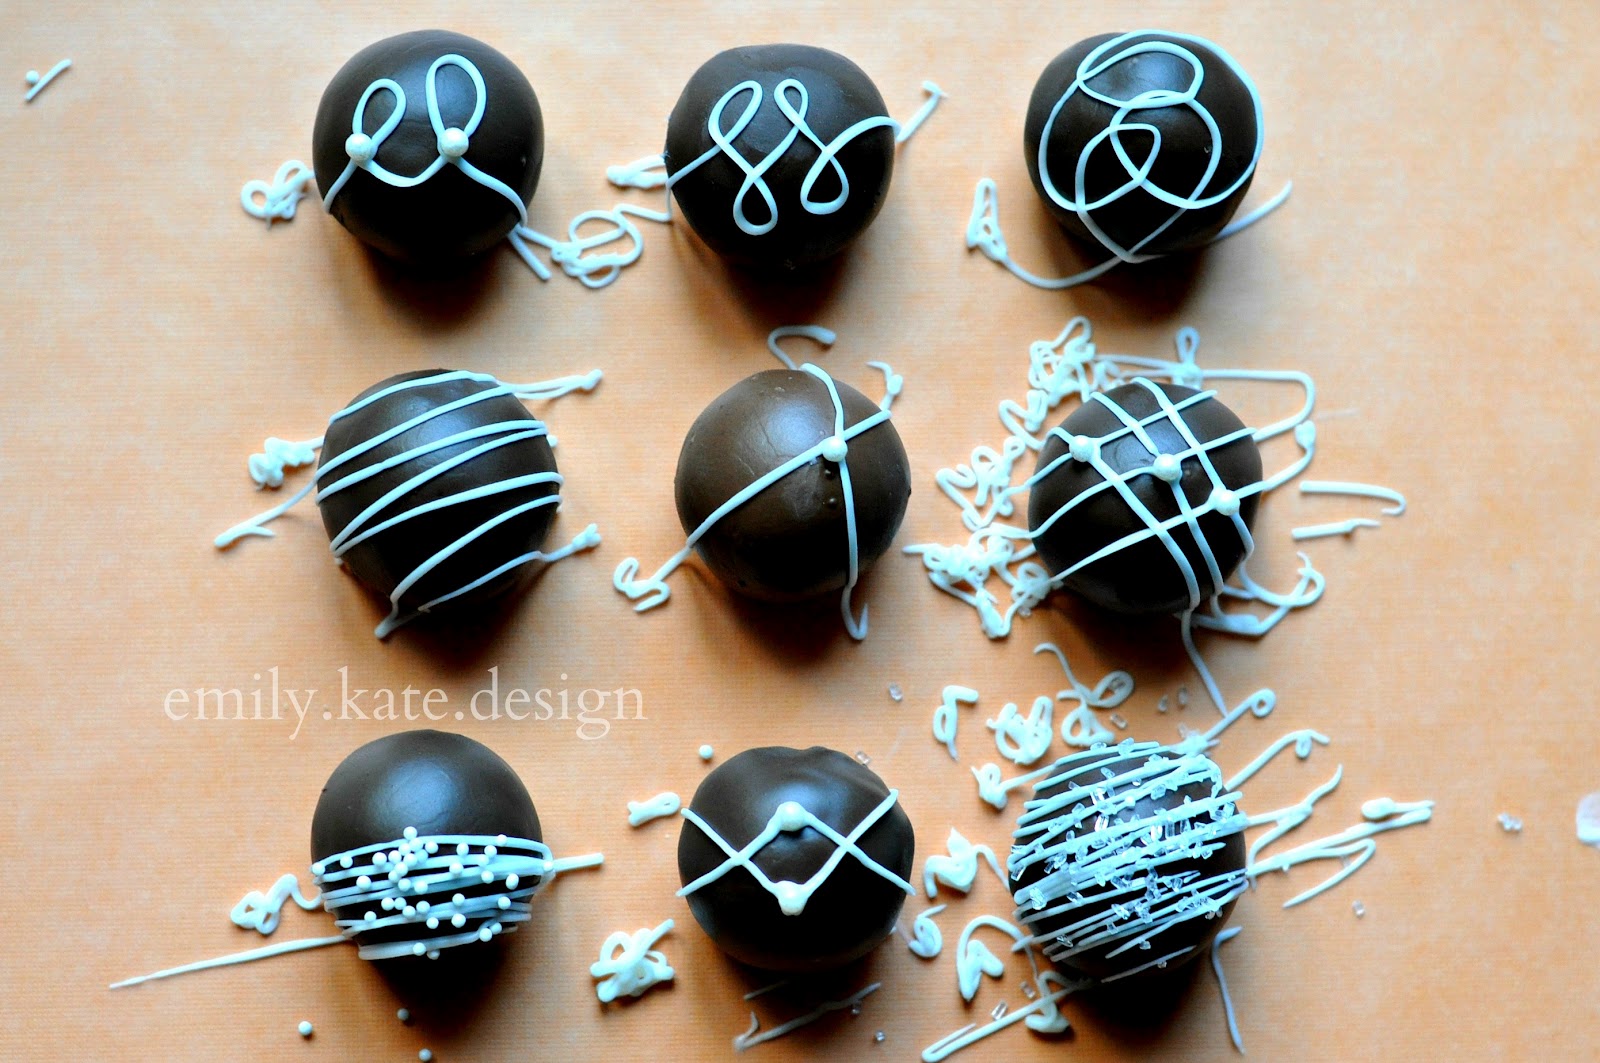
6. Pipe away! The key to your designs
should be this: less is more! Simple
designs can be very classy. You can add
interest to your design by mixing colors – using colored sprinkles or using
different colors of piping. If you add
sprinkles, don’t shake them out of the jar.
Put a desired amount in your hand, and lightly sprinkle using your
fingers. The bigger the sprinkle, the
less you should use. Most people prefer
to not have to crunch their way through truffles because of a lot of sprinkles.
You
can see in the picture below of few of my favorite designs. I use both straight and curved lines. When piping, take your time! You can always re-melt your chocolate if it
starts to harden. If you keep the hole
in the bag smaller, you have more control over your piping. If you mess up or make a mistake, you can
always add a sprinkle to cover it up.
Step
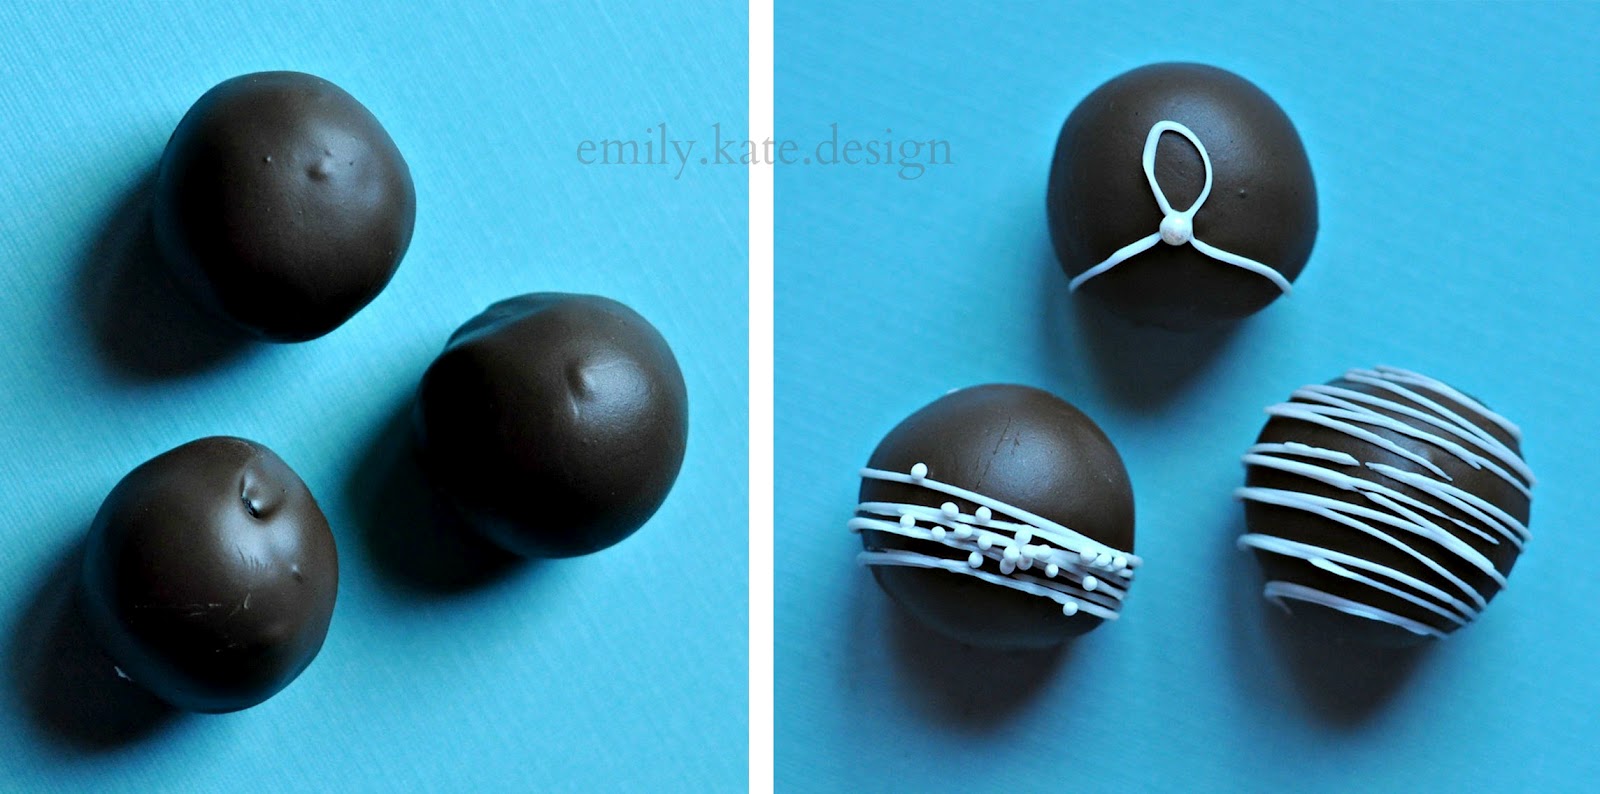
7. Rarely do I ever dip an entire batch of cake balls without having a few
“mess-ups”. But, don’t let them go to
waste! If there are air bubbles,
misshapen bites, or odd bumps, just add a design over the top. As in the photo, your before and after will
amaze you with a little creativity. No
one will ever know!
Step
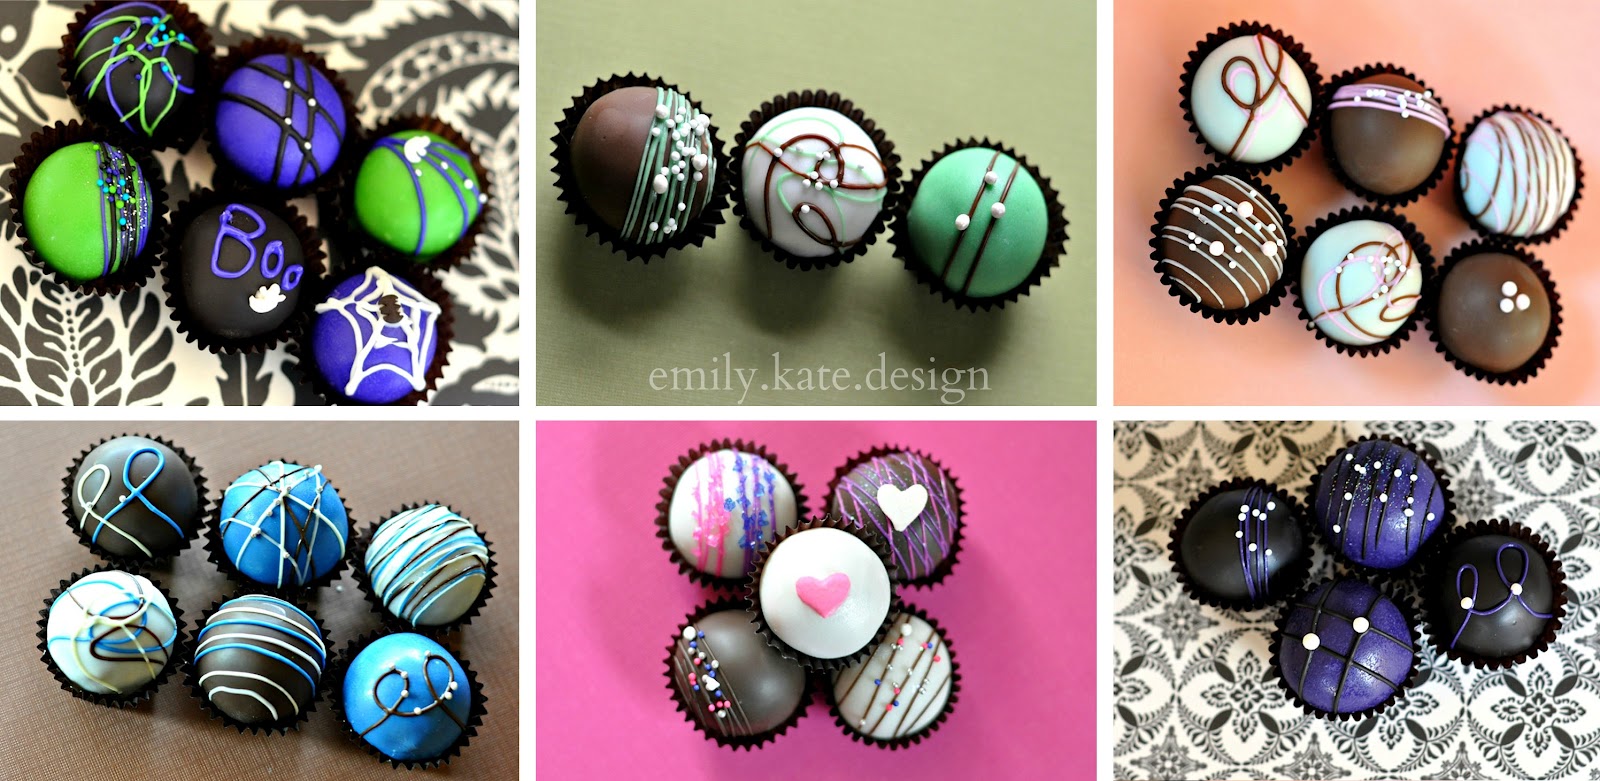
8. To finish them off, place your truffles in their cups/liners and serve! The cups/liners that you put them in and the
tray or dish you serve them on is just as important. Choose something simple and elegant that will
compliment your design. It will be hard
to pass up snagging one of these treats!
8. To finish them off, place your truffles in their cups/liners and serve! The cups/liners that you put them in and the
tray or dish you serve them on is just as important. Choose something simple and elegant that will
compliment your design. It will be hard
to pass up snagging one of these treats!
Remember
the importance of “practice, practice, practice”! Learning to make “classy” designs doesn’t
happen overnight. It takes practice and
a lot of patience. Come up with your
original own designs, color combinations, and sprinkle choices to make personalized
cake truffles. Find inspiration in
things around you – even something as simple as a flower!
Good
luck and happy decorating!
luck and happy decorating!
Images, text and all other content Copyrighted©Karyn Granrud, Susanne Queck and Wunderlander Verlag LLC, or ©Pro Stock Media via Canva.com. Unlicensed republishing permitted. As an Amazon affiliate, we earn on qualified purchases.

So pretty! Thanks for all the tips and ideas for different designs to pipe!
Just gorgeous! Thanks for the tips!
Very nice!!! How do you get the from having any exposed cake underneath?
Hello there! If you look in the photo where the cake ball is on the fork (pictured above), you can just slide the ball right off the fork. My bottoms are almost always covered with no exposed cake. If you happen to have cake exposed, however, you can just take the cake ball once it is dry and dip the bottom in some chocolate again. Hold it in the air (don't put it down on it's wet chocolate bottom) and let it dry a bit. That should do the trick!
Thanks for the tips and thanks for linking up on Foodie Friends Friday!
These look so delicious.
Maria Crafty Chic
These look amazing! Thanks for sharing, pinning also!
These look so delicious! Chocolate Yay!!! Visiting from Flaunt it Friday 🙂
These look beautiful and delicious! Thanks for sharing on Foodie Friends Friday!
I LOVE how gorgeous these are! They definitely do NOT look homemade.
These are beautiful. I have a Blog Hop, and I would love it if you would link this post. You can find it at
http://www.adornedfromabove.com/2012/07/surf-spray-and-wednesdays-adorned-from.html
It is called Wednesdays Adorned From Above Blog Hop.
I hope to see you there. Have a great Day.
Debi Bolocofsky
Adorned From Above
http://www.adornedfromabove.com
These truffles look lovely! Thanks for sharing on Foodie Friends Friday!!
Those are beautiful! Thanks for the tutorial, maybe it'll help me get better looking cakeballs. 🙂
These not only sound delicious, but they look divine!!
So gorgeous! It's been a really long time since I made truffles. You've got me itching to dip stuff in chocolate.
These are gorgeous looking!
Thanks so much for this tutorial – very helpful
Thanks for all of the wonderful comments, everyone! I sure did enjoy sharing some of my tips and tricks with you. A big thank you, of course, to Miss Pint Sized Baker herself. =]
Thank you for you wonderful pictures and designs. I love them!
Yum! These look beautiful! I will definitely be trying this 🙂
Wow those look great! I am making cake balls for a baby shower. What is your favorite recipe? I am a new follower. Hope to see you at True Aim. Thanks for sharing!
A favorite recipe?! That's like asking me to choose a favorite child =]!
Well, you can start with any recipe that Miss Pint Sized posts here, of course. She makes everything easy for bakers of all ranges. I like any recipe that is no hassel and easier to use. I use a lot of Betty Crocker recipes – her cookbooks are my favorite. If you're looking for a new recipe, I might start there! Bakerella also has wonderful recipes. That doesn't narrow it down for you, but it's a good place to start =]! Happy baking!
You make it look so easy! these are too cute! and I'm sure yummy too! Please come hang out and link up to our link party "Home is Where the Heart is" Please feel free to link up any posts you might want to share! 🙂
http://www.homesteadsimple.com/home-is-where-the-heart-is-link-it-up-wednesdays-3/
wow.. so pretty to eat!!! love it.
Thanks for sharing at Create & Inspire
XO
Angie
wow these look amazing!! pinning!!
Would love it if you could share this on my link party Serenity Saturday @ http://www.serenityyou.blogspot.com
Thanks for the invite over. Just linked up!
This isn't food! This is art!!!
I'm speechless…
(Yummy art!)
These make me hungry. They look so yummy, and they are absolutely beautiful! Great work.
I always love her photos – gorgeous! And I agree, piping designs and/or sprinkles over flaws is always a good way to hide a minor flaw in an otherwise great cake ball ;).
Hi! These look delicious! I'm totally pinning them! I’m stopping by from Whimsy Wednesday to say hello. I hope you’ll come visit me at jugglingactmama.blogspot.com
Oooohhhh these look soooo good!
So many great tips! These truffles are just gorgeous! Thanks so much for sharing at Mom on Timeout – pinning now!
This is a beautiful presentation for your Classy Cake Truffles, they look delicious. Hope you have a great week end and thank you so much for sharing with Full Plate Thursday.
Come Back Soon!
Miz Helen
Those look awesome! I love the designs on them!
Thanks for sharing with my Super Link Party! 🙂